在 Windows 中构建 Linux 工作环境
目前我的机器上安装的唯一操作系统是 Windows 10,但我在平时的学习过程中又常常需要用到 Linux,以及 UNIX 环境下的众多命令行工具。我不想在硬盘上安装双系统,也不想「完全用 Linux 工作」,我希望能够同时享用这两个(种)系统的好处。我可以使用虚拟机。
我习惯的 Linux 发行版是 Ubuntu. 大部分情况下,我不需要 Desktop 版所带的花里胡哨的图形界面,我选择了 Server 版。但是我偶尔也有显示图形窗口的需求,如使用 Octave 或 matplotlib 画个函数图像。对于这个需求,可以使用 X11 Forwarding 来完成。下面是我的配置过程。
配置 Virtual Box
- 下载并安装 Virtual Box
- 下载 Ubuntu Server 16.04 LTS 镜像,并在虚拟机中新建机器,安装。
- 为虚拟机开启 3D 加速:Settings -> Display -> Enable 3D Acceleration.
- 启用 Port Forwarding,方便从 Windows Host 使用 SSH 连接到虚拟机:Settings -> Network -> 选择 NAT 网络,并在 Port Forwarding Rules 窗口中添加规则,将特定的 Host Port 映射到 Guest Port 22. 其中 Guest IP 可在虚拟机启动后使用
ifconfig查看。 - 添加共享文件夹:Settings -> Shared Folders -> 添加共享文件夹并设置 Folder Path 与 Folder Name,此处的 Folder Name 与下文对应。
-
值得一提的是,Virtual Box 支持命令行启动,虚拟机也支持 Headless 模式。如果你像我一样安装了 Cygwin,并且使用 bash 作为日常的 shell 使用,可以在 .bashrc 中加入类似
 alias vm-start="VboxManage startvm \"ubuntu\" --type headless"
 alias vm-sleep="VboxManage controlvm \"ubuntu\" savestate"
的语句方便随时启停虚拟机。具体的参数列表可参考 Virtual Box 的文档。
配置 Guest Machine
-
安装 openssh-server,以便从 host 中通过 ssh 连接 guest machine:
sudo apt-get install openssh-server -
安装 Virtual Box Guest Addition:
sudo apt-get install virtualbox-guest-x11安装 Virtual Box Guest Addition 的目的有两个:
-
实现文件共享。
-
提供 OpenGL 支持。原理是:
Technically, VirtualBox implements this by installing an additional hardware 3D driver inside your guest when the Guest Additions are installed. This driver acts as a hardware 3D driver and reports to the guest operating system that the (virtual) hardware is capable of 3D hardware acceleration. When an application in the guest then requests hardware acceleration through the OpenGL or Direct3D programming interfaces, these are sent to the host through a special communication tunnel implemented by VirtualBox, and then the host performs the requested 3D operation via the host’s programming interfaces.
-
-
安装完毕后,重启 Guest Machine. 要挂载共享文件夹,可使用:
mount -t vboxsf <folder name> <destination>其中
<folder name>即上文设置的 Folder Name,<destination>为挂载目标文件夹,如 /home/alice/share-folder 等。如果希望开机自动挂载,可以将该命令添加至 /etc/rc.local 文件。此时如果直接重启,可能会出现挂载不成功的现象。如果使用cat /var/log/syslog | grep rc.local,可以发现类似rc.local[1077]: mount: mount point /home/alice/share-folder does not exist或
rc.local[1095]: mount: unknown filesystem type 'vboxsf'的条目。第一个错误很好解决,直接在对应路径新建目录即可。第二个错误出现的原因是,在 rc.local 中的命令执行时,vboxsf 模块,即 Virtual Box 处理共享文件夹的模块,还未加载到内核中,因此无法识别对应的 filesystem type. 解决方法是在
/etc/modules加入一行vboxsf即可。
配置 Host Machine
-
安装 X Server,可选 Xming,Cygwin/X 或其他解决方案。我已事先安装 Cygwin,因此选择了 Cygwin/X.
-
Cygwin/X 提供了几种 OpenGL 渲染选项,大致上就是 indirect(在 Server 端渲染)、direct(在 client 端渲染)、software rendering, hardware-accelerated rendering 的排列组合。要启用对应的选项,应该将 Host Machine 中的 Xwin Server 快捷方式的 Target 修改为:
 ${path-to-cygwin}\bin\run.exe --quote /usr/bin/bash.exe -l -c
 "/usr/bin/XWin :0 -listen tcp -multiwindow -clipboard +iglx -nowgl -ac"
其中
${path-to-cygwin}指 Cygwin 的安装目录。Xwin 各参数的意义可参考这个链接。 -
启动 Xwin Server 后,可使用 Putty 或其他方式通过 SSH(启用 X11 Forwarding)连接 Guest Machine. 其中 Putty 中启用 X11 Forwarding 的方式为:Connection -> SSH -> X11 -> Enable X11 forwarding, 并设置 X display location 为上文设置的
:0.
测试
如果没有意外,应该能直接通过 SSH 连接至 Guest Machine。要测试 X11 Forwarding,可安装 x11-apps:
sudo apt-get install x11-apps
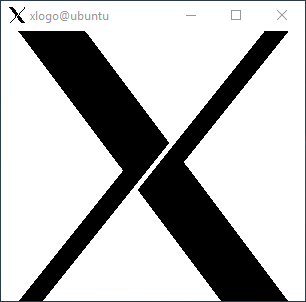
安装完成后,执行 xlogo,应该能在 Host Machine 的桌面中弹出一个窗口显示 X Window 的 logo.
要测试 OpenGL,可安装 Octave 画个函数,或安装 mesa-utils:
sudo apt-get install mesa-utils
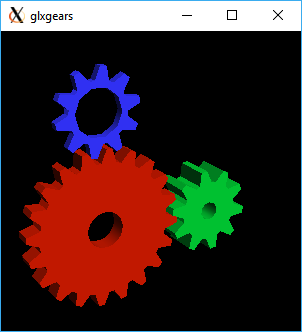
安装完成后,执行 glxgears,应该能看见弹出窗口显示三个旋转的齿轮,同时终端打印帧率等数据。
163 frames in 5.1 seconds = 31.764 FPS
164 frames in 5.0 seconds = 32.645 FPS
117 frames in 5.0 seconds = 23.301 FPS
157 frames in 5.0 seconds = 31.260 FPS
194 frames in 5.0 seconds = 38.646 FPS
249 frames in 5.0 seconds = 49.681 FPS
234 frames in 5.0 seconds = 46.426 FPS
参考
- https://help.ubuntu.com/community/VirtualBox/GuestAdditions
- https://askubuntu.com/questions/365346/virtualbox-shared-folder-mount-from-fstab-fails-works-once-bootup-is-complete
- https://www.virtualbox.org/manual/ch04.html
- https://x.cygwin.com/docs/ug/using-glx.html